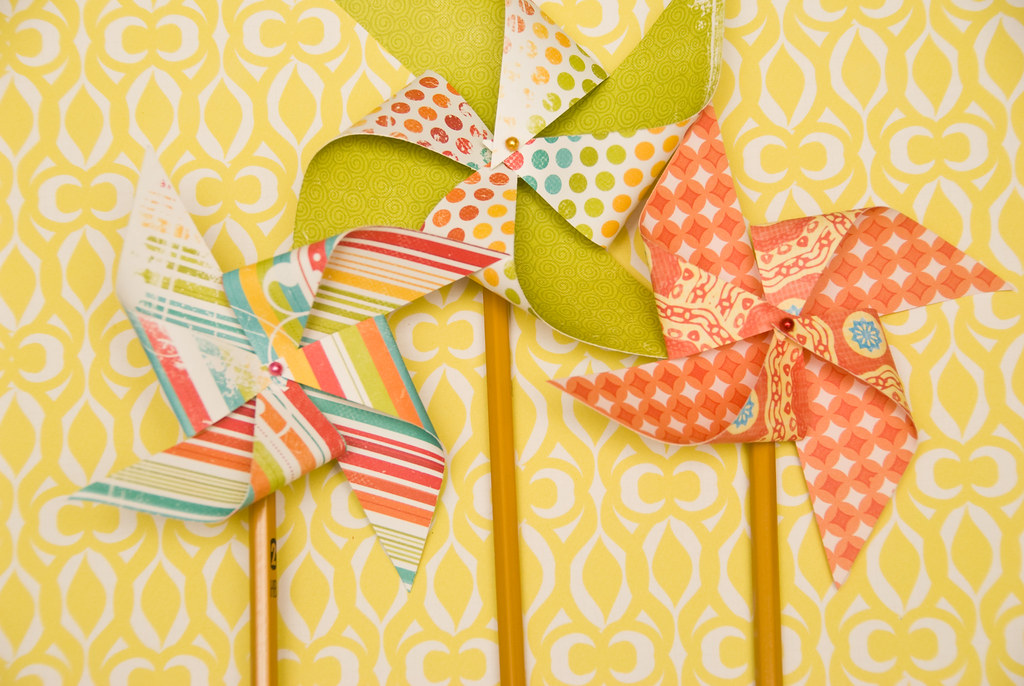
 Happy June! Can you believe it? It's truly summertime. Based on this post and this photo shoot, I suppose it's no secret that this girl has a pinwheel fetish. I had a few inquiries about exactly how I made these little paper+pencil pinwheels, so I thought I'd share this simple tutorial to kick off the season of sandals+ sunshine. They are quick to make and would make killer centerpieces and/or favors at that big summer bbq you're planning. Or what an amazing send-off at your summer wedding...Imagine all your guests lined up with hundreds of bright paper pinwheels in hand. Yum. Or you could just make one for you. For your little flower bed. No fancy occasion necessary.
 First things first, gather up:
a bunch of cheap yellow pencils (you can sharpen and reuse them in September!)
scissors
pretty sewing pins
double-sided paper (stock up at your local scrapbooking store)
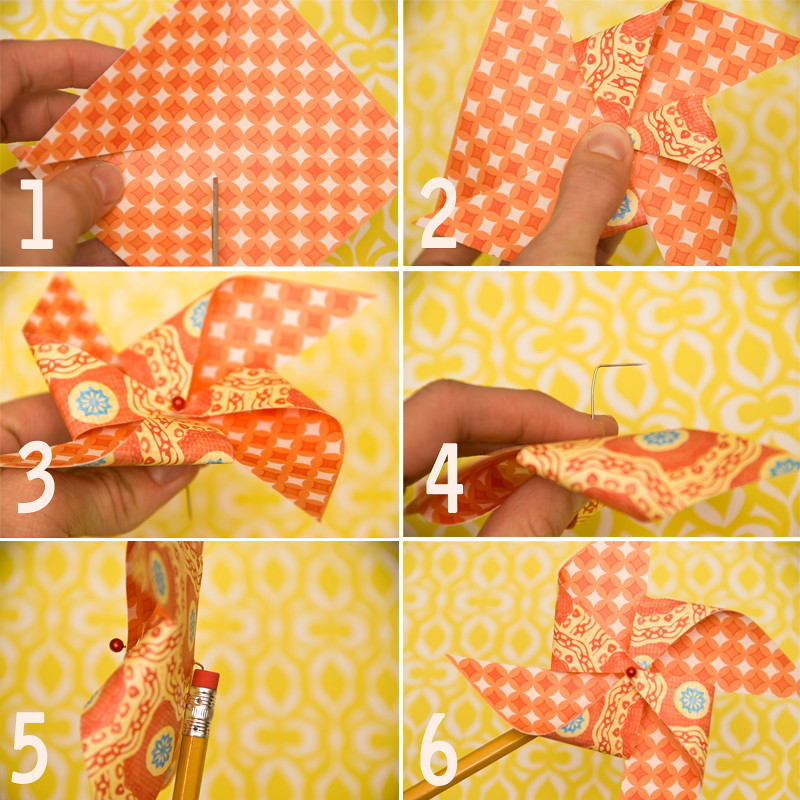
1. Cut your paper into 4x4" squares. (5x5" makes a slightly larger, equally cute pinwheel. Go ahead, experiment with sizes.)
Next make 4 diagonal cuts toward the center. Stop about an inch shy. No mathematical equations here. Just eyeball it.
2. Gently fold pieces to the left of each cut toward the center. Hold firm with your thumb.
3. Press pin through center, being careful to catch all 4 corners. 4. When the pin reaches the other side, bend it into a 90 degree angle. (Hint: I actually poked mine straight through the pencil eraser first, then bent down. It doesn't matter how you bend it...As long as you get the job done.)
5. Press pin firmly through top of pencil eraser.
6. Give it a whirl! Easy, peasy, right!?
6.01.2010
paper pinwheel how-to
Subscribe to:
Post Comments (Atom)


11 comments:
thanks so much for the tutorial! I can't wait to try. also LOVE your doily usage for the farm chicks! who would have thought?! have fun out there!
those are so cute! i think i might attempt these for a bridal shower...you inspired me.
These are adorable! I can't wait to make a whole flock of them...
Thank you for sharing this DIY! Love it!
Yay...I found your blog! I was so worried that I would lose your cute little card in and amongst all of my farm chicks goodies. :)
It was so good to meet you on Saturday! I looked at Graham's sweet First B-day pictures. You're so very creative! Love the picture of the Man in the Yellow Hat...too funny! :)
So cute!! Loved your booth at Farm Chicks!!
may I pretty please with sugar on top see pics of farm chicks.
Im drooling big time over here.
So pretty, and simple too! Thanks for the awesome tutorial. xo
Post a Comment