
 Graham & I just got back from spending a few days with my parents, where we made a batch of super swirly fun toddler crayons. {I saw this idea here a couple years ago--and always thought it would be so fun to do with my own kiddo.} Grandmas always seem to have an amazingly endless stash of dull old broken crayons just dying to be melted into something new and even better; begging to be saved from the circular filing bin that lies beneath the kitchen sink. These turned out so pretty, like a well-needed splash of color on a dreary early spring day and I had to share. I had to borrow my little bro's point and shoot, so sorry the pictures are a little fuzzy! {Note to self, never travel without your camera. You should have learned that by now.}
So by now you're dying to melt your own batch, right?
Here's how:
Supplies:
muffin tin (we used a mini circle size, but how fun would it be to make these heart, cloud, or flower shaped!?) and no, the pan did not get ruined. it's just a little wax!
crayons of all colors and kinds
oven
freezer
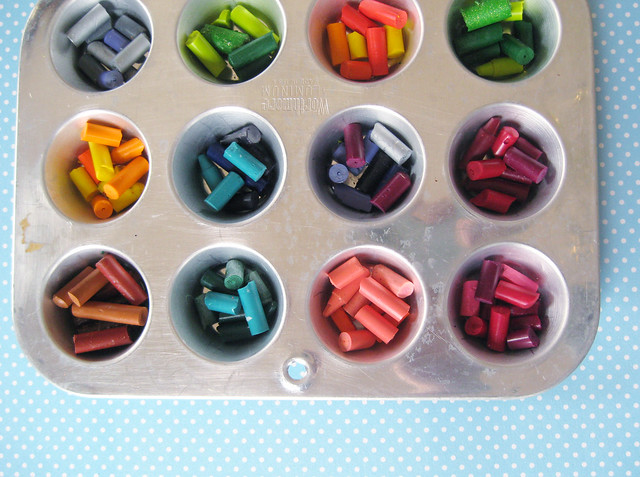
1. Unwrap & break crayons, then plop them straight into the tin. I was pretty conservative about mixing colors, but there are no rules here. go crazy!
2. Fill tins about 1/2 full with crayon pieces. Pre-heat oven to 300 degrees.
3. Bake for 15-20 minutes or until wax is completely melted. Allow to cool completely. Hooray--you've got crayons that look something like this: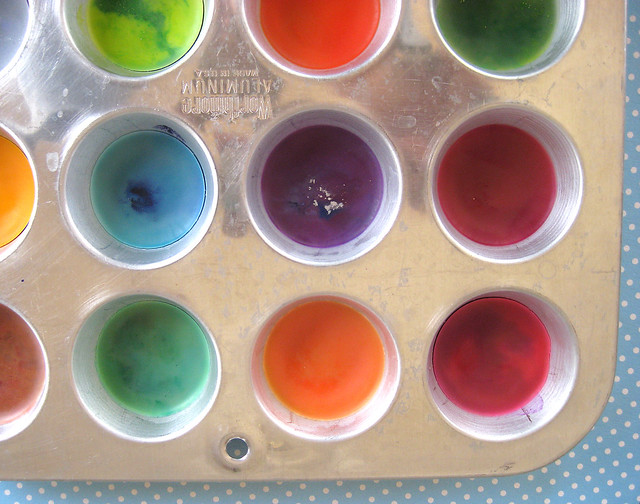 4. Flip pan over and give each hole a good tappity-tap. If some of the crayons don't pop out immediately, don't fret. Just stick it in the freezer for 10-15 minutes then try again. They should come out with minimal effort.
5. Admire your pretty results and snap a quick pic before sharing them with busy little hands.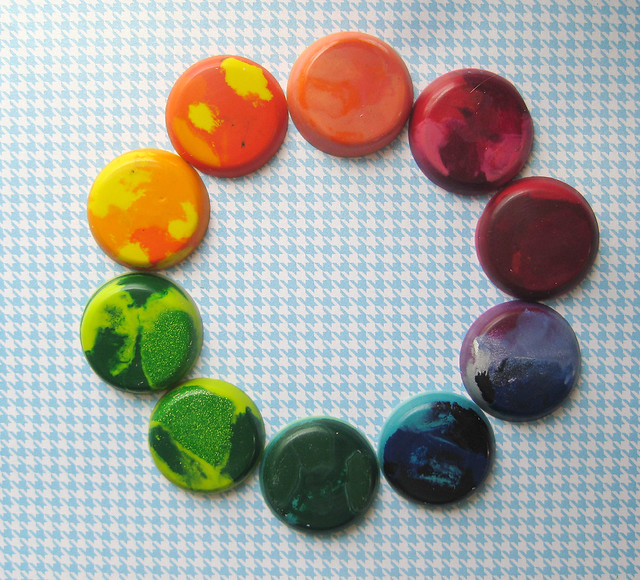 Note: Glitter or metallic crayons are the best! I love how our glittery green and the metallic silver mixed with purple turned out.
3.20.2011
diy recycled crayons
![]()

Subscribe to:
Post Comments (Atom)


11 comments:
These are so fun!! I have made these at work so many times. I have used the heart silicone pan and works great!! We have also added in glitter.. that's fun too!! FUN FUN!!!
Okay, so I'm in my mid-twenties and I want to make these. Er, and I don't have any kids. LOVE the idea of making them into shapes.
@amanda: that is awesome! i bet silicone works even better. thanks for the tips!
@alivia: you're never too old. i'm seriously having just as much fun with them as graham. err...obviously since i'm blogging them. ;) go for it girl!
What a fabulous idea! I've seen it before, years ago, somewhere, but had forgotten all about it. Thanks for sharing! We will definitely make these this week... hurrah for spring break!
I'm going to plan on making these this week, too! Fun! Thanks for sharing. :)
OH my gosh I love this!
love this idea - I'm saving it for when my kiddo is old enough to start coloring!
also, i'm linking to it at 11am CST on my new blog, Loving Lately!
That is such an amazing idea!! Thanks Jessica! That would come in handy where I work, there is always a plethora of broken crayons and now I know what I could do with them!
I love, love love this idea. I'm an adult without kids and I want to make these for myself!!
Now that I've read your post I will no longer have a GALLON size bag of crayons that no one ever wants to use. Will be doing this TODAY!!!!! Thanks!!!
(I've done this with candles. Why have I never thought to do it with crayons??)
I'm a children's librarian, and I recently used your idea with a group of 8-10 year olds. They loved it! Thanks for sharing!
Post a Comment